
Tuesday 13 June 2017
Assignment 3.0 : Tray Tutorial
Step 1
Cut the aluminium sheet to size using the guillotine.

Step 2
Using some cylindrical tools, mark out rounded corners around the outside perimeter of the tray. Then, mark out straight guidelines to show the height of the tray walls. Using the same cylindrical tools for the outer corners, join the lines created by marking a rounded corner. Make sure both your piece and your partner's piece are exactly the same.

Step 3
Cut the rounded corners out using tin snips.

Step 4
Create a template out of timber that would be the exact size required for the inside of the tray. This would ensure that the size and shape of the tray is as accurate as possible. Make sure that the thickness of the timber is greater than the wall thickness.

Step 5
Hold the template against the aluminium piece in the exact location required and secure the pieces together in a clamp.

Step 6
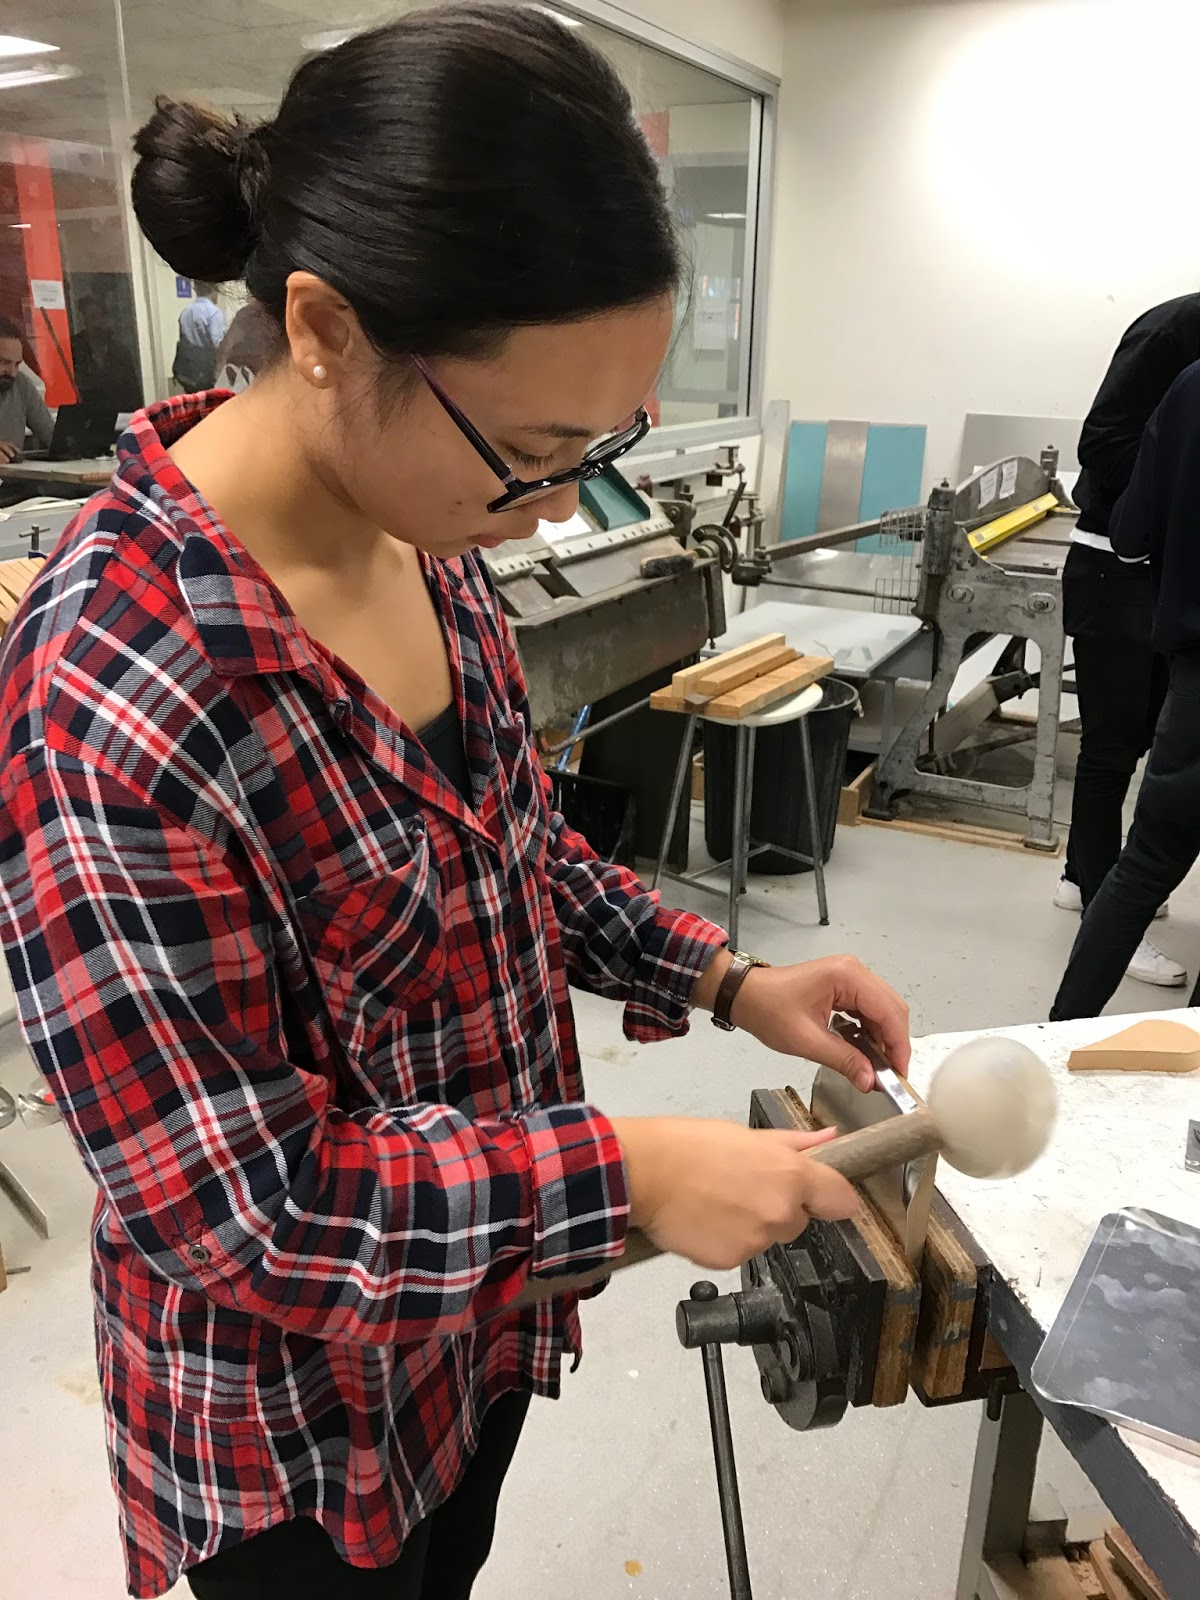
Start hammering down the sides of the tray using a mallet. I found that it was easier to hammer down the two edges next to the corresponding corner first and then gradually make your way around that corner. This would ensure that the shrinkage of the metal would only occur around the corner with minimal disturbance to the flat edges. By doing this gradually, it this would prevent any kinks and overlapping to occur.

Step 7
Cut off the overhanging corners using tin snips.


Step 8
Compare with partner to ensure that you are both on the right track. Ensure that both trays are of similar shape and size.


Step 9
Fix up any parts that need amending in order to match up with partners tray. Define the edges, making sure they have around about the same radius throughout. Ensure that the walls are flat, pressed up against the template. This may mean that the template could get stuck in the tray so using timber that has a greater thickness than the wall thickness would make it easier to remove.

Step 10
Sand down the edges to create a flat surface. This would ensure that the surface of the perimeter is consistent all the way around.

Step 11
Final comparison


Final Product


Tips
Don't use a flat metal hammer as it creates harsh dents onto the aluminium piece. Instead, use a rounded plastic mallet as a better option. This creates less damage on the aluminium.

Make sure the piece is secured tightly in the clamp, to prevent it from moving around after each hit.

Make sure you are confident in hammering and don't second guess your process by continually removing the piece from the clamp and away from the template. This reflects on the result of the tray making the walls uneven.

Monday 5 June 2017
Assignment 2 : Ferrari 250 GTO
Creating Waffles
As a group, we started off by deciding on creating the car using interlocking waffle slices in Slicer for Fusion 360.

As we played around with the settings, and with the help of tutors, we were able to decide that it would be better to have more slices as it was able to give a better representation of the Ferrari 250 GTO. This gave us a more detailed model of the car as the signature Ferrari curves and overall shape was more prominent.

Assembling the Waffle
The waffle slices were laser cut on MDF boards and assembled by interlocking each piece into the corresponding slot.

As we were assembling our model, we discovered that we didn't account for an allowance for the board thickness within the slots. We also realised that the large number of pieces made it difficult to assemble the car as each piece was pushing against each other. This made it difficult to slot the pieces together by hand as it was becoming too tight. As a result, we used a mallet to give each piece the final push into the correct position. All these missed considerations contributed to the struggle we faced during this assembly.
*Lesson to take away from this experience: Test things out before committing! In order to prevent this from happening, we should have started off by cutting a few pieces then see how they feel slotting together. Then alter the file in order to accommodate to the change.
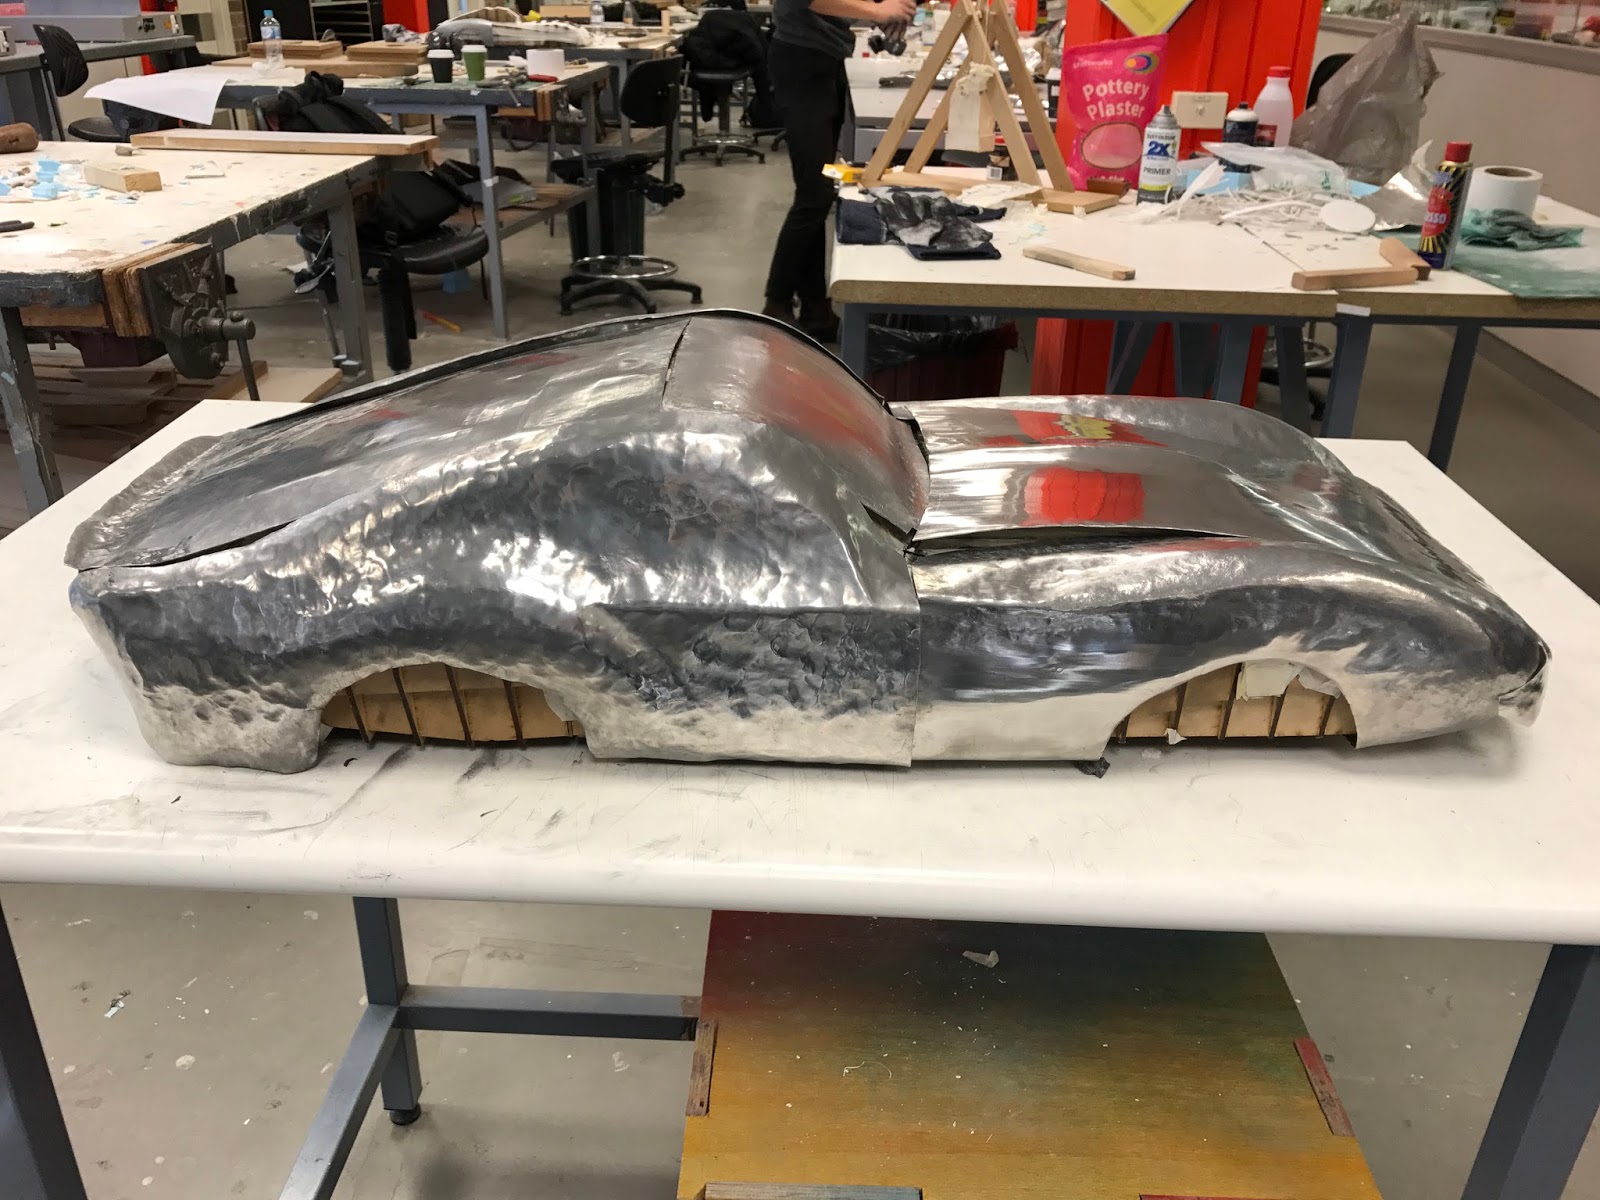
Dividing Car into Parts

As a group, we covered the surface of the waffled Ferrari in masking tape in order to better visualise the curves that make up the car as a whole.

From this stage we were able to section off the car by marking out parts over the masking tape. This helped us in deciding how to distribute the car between the team. We then decided on who wanted to work on what parts each member of the group would be responsible for.

I chose to work on the bonnet as well as the front bumper. Celina and Nobel chose to work on the sides on the front end of the car. Esther and Vince on the sides at the rear. Yune chose the rear and top of the car including the windshield.
The Making of the Bonnet
We each created a template by tracing our chosen part on some tracing paper.

The next stage was to then mark our templates onto our aluminium pieces while marking out the piece around 10mm bigger than the template. Leaving some extra space around the perimeter allowed for room for error. I then cut the piece out using tin snips. I also took down some measurements for the dimensions of the detailing on the bonnet in order to help me to precisely replicate the model. These dimensions were then marked onto the inside of the piece in order to guide me in hammering in the correct location.

I started my piece off by hammering out the vertical detailing on the bonnet using the pointy end of the mallet. However, I was not able to achieve a clean indentation.

I then created a timber tool in order to define the detailing. This allowed me to make a more precise indentation.

It was also important to keep going back to the car and comparing my piece to the original part. This allowed me to make sure I was hammering the correct sections. By gradually hammering out the detailing and continually checking against the model, I was able to make sure that I didn't over hammer that particular section.

I then used the English Wheel to roll out the curve of the bonnet. This allowed me to achieve a smooth equal curve throughout the surface of the piece.


I started off the front bumper by hammering down the end piece using the rounded end of the mallet until it was curved over to my satisfaction.

The first assemblage of our car with the parts of each group member.


I created the grill by using the same timber tool used for the previous sections. I was able to place the grill in the correct position by following the markings I measured out at the beginning. I also kept referring back to the model car as I gradually hammered the piece to make sure I was on the right track.

I also used the tool in order to create the grill detailing by hammering out a vertical pattern on the inner surface of the front bumper.

I then used tin snips to trim the excess edges of my piece.

I then defined the detailing by hammering the pattern along the outer surface of the bumper.

The final stage was to polish my piece using Brasso in order to make it shiny and more presentable.


Final Group Assembly


Subscribe to:
Posts (Atom)